Showing posts with label MISTI. Show all posts

Friday, 28 December 2018

Kitchen Sink Stamps -Winter Cardinals
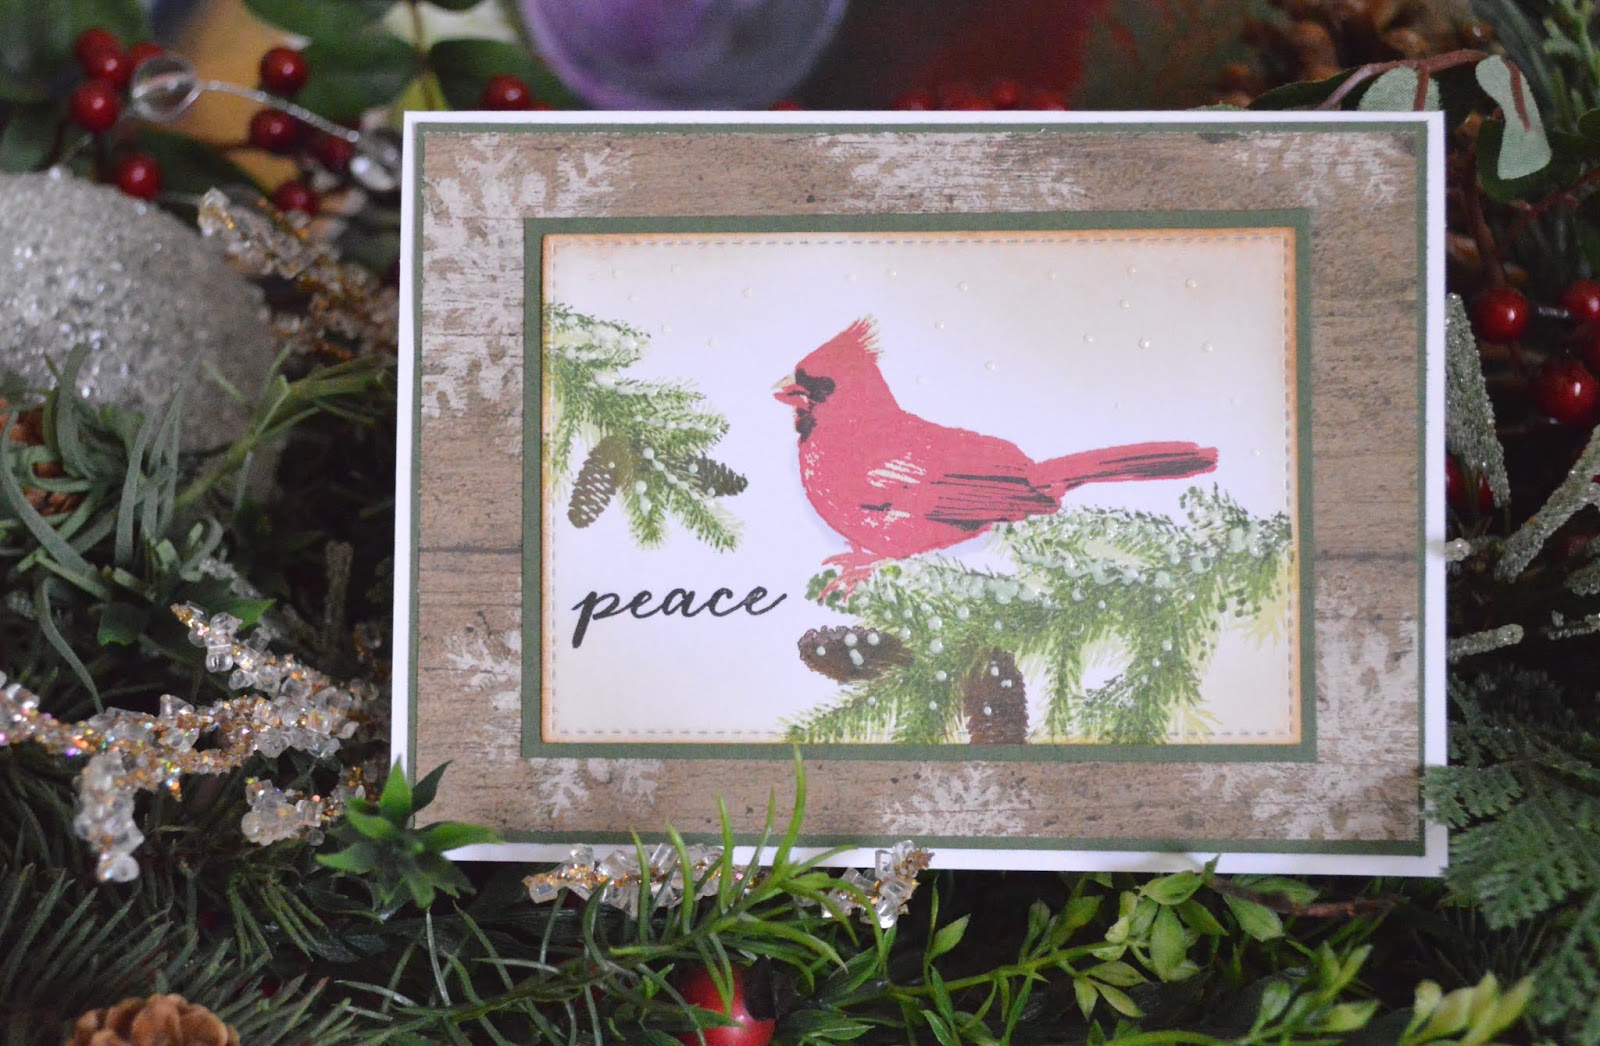
Kitchen Sink Stamps -Winter Cardinals


Welcome back everyone! I have been taking a bit of a break for a few reasons, but slowly moving back into work mode.

Today, I am going to feature a great company out of California, called Kitchen Sink Stamps.  I came to know of them this past summer while attending a stamping convention, called Junkie 
Fest, which was hosted by the Stamp Junkies, an amazing online Facebook group. Kitchen Sink Stamps has hundreds of designs and specialize in multi step clear stamps, where the images look very real. If you haven't checked them out....get on it!

Anyways, I have created several of these cardinal cards to use as Thank You notes that I am sending out this week. I had surgery one week before Christmas, and many, many people did wonderful and kind things to help my family and I out this last while, and I certainly wanted to create cards to share my gratitude. 

I kept all the cards similar as I wanted to get about 25 done in a short time while I was able to sit up (on bed rest...flat) and created them over 3 times in just over an hour. So not bad!

I started with an A2 white card base, then matted with olive green cardstock and a wood grain, snowflake patterned paper, all from Recollections. Then using Neenah white cardstock, I cut a bunch of mats at 4" x 2 3/4" and matted them again on the green. 

Image from Kitchen Sink Stamp

Then it was time to load my MISTI and get stamping! I started with the branches. I stamped the first layer using Versafine 'New Sprout', second layer is 'Olympia Green', followed by 'Vintage Sepia' for the pine cone layer.


For the cardinal, I used Rangers 'Antique Linen' first, followed by Lawn Fawn 'Lobster', then Hero Arts 'Red Midtone'. Last layer for the beak and a touch of detail is Versafine 'black onyx'

The cards received  different sentiments on the outside, yet all read Thank you on the inside. 
This "Peace" stamp shown here, is by Hero Arts.

After the cardinal was done, I added a very slight shadow under his belly with a C3 Copic marker. 

For just a bit more depth and keeping it easy, I went around the edges with a foam piece and a bit more antique linen ink. 

Finishing touch was the random snow using Nuvo drops in 'white'

I hope you enjoyed today's quick card and please do head over to Maria's wonderful company Kitchen Sink Stamps. She has great designs, and a sale on many sets right now!


Remember...be creative, think of others and kindness always matters.


 Kim

(please note, this is an affiliated post)


Wednesday, 4 October 2017

Perfect Poinsettia


Yes, it may only be the beginning of October according to the calendar, however, Christmas is well under way on the crafting calendar!  Us makers, are always working well ahead. From this point on, my house has glitter trails everywhere as I am always working away on something to get ready for the Christmas craft show season.

I don't plan on buying too many new stamps/dies this year, as I did purchase many new ones last year, and never really got to use them all, so I will be selective this year. But, hey, it is early and I could be eating my words after seeing all the new stuff that will be released shortly by the companies!  One new one I have already picked up is from Gina K Designs, and it is called Perfect Poinsettia. It is a layering stamp and I just love it! I found it very easy to line up and get great results quickly. I have not played too much with different colour combinations yet, but I will as I create more and more Christmas cards. I know most people think of poinsettias as red flowers, but they do grow them in white and pink as well. When I was florist, pinks were always my favourite. I loved to see a mass of the pink flowers accented with gold decor, it was just so classy I thought.


Using my MISTI, I started off stamping using Gina K Design white pigment ink onto Gina K Design layering white paper. I used pigment ink first, as I find I can get a different look, when using dye inks as the layering colours on top. It also keeps the colours much brighter, once they all dry. Once I stamped the white layer, I give the same stamp a quick wipe to get the pigment off, then ink it up the 'Innocent Pink'. This is where the fun happens as you can see the dye ink sitting atop the pigment because it can't soak in right away, so it creates a bit of a beading or mottled look.


I continued to stamp out the next three layers, lining up the center each time. I found this set very easy for aligning the layers. I focused on one cut out area each time and was just fine for placement. You can see in the picture which little notch I used!


The outline layer was done in 'Kraft', the next layer was 'Dusty Rose' and the final detail layer was 'Red Velvet'.  Leaves were done in Dandelion, Jelly Bean Green and Grass Green.


After all the stamping was done, I fussy cut out the leaves and two flowers as I wanted layers and depth for the card front.

To create the card, I embossed the green layer of paper with a swiss dot pattern and then started adhering all the pieces. A quick sentiment and some enamel dots and card was complete!

I look forward to making many more cards with this set and seeing all the possibilities it has. For now, I hope this one has inspired you to start creating some Christmas cards or maybe complete some you already have underway. Remember to check out Gina K Designs for this set and other new ones that will be released shortly.


(This is not a product affiliated post.....I just share what I buy and love)


Remember...be creative, think of others and kindness always matters.

 Kim