Showing posts with label christmas cards. Show all posts

Friday, 28 December 2018

Kitchen Sink Stamps -Winter Cardinals
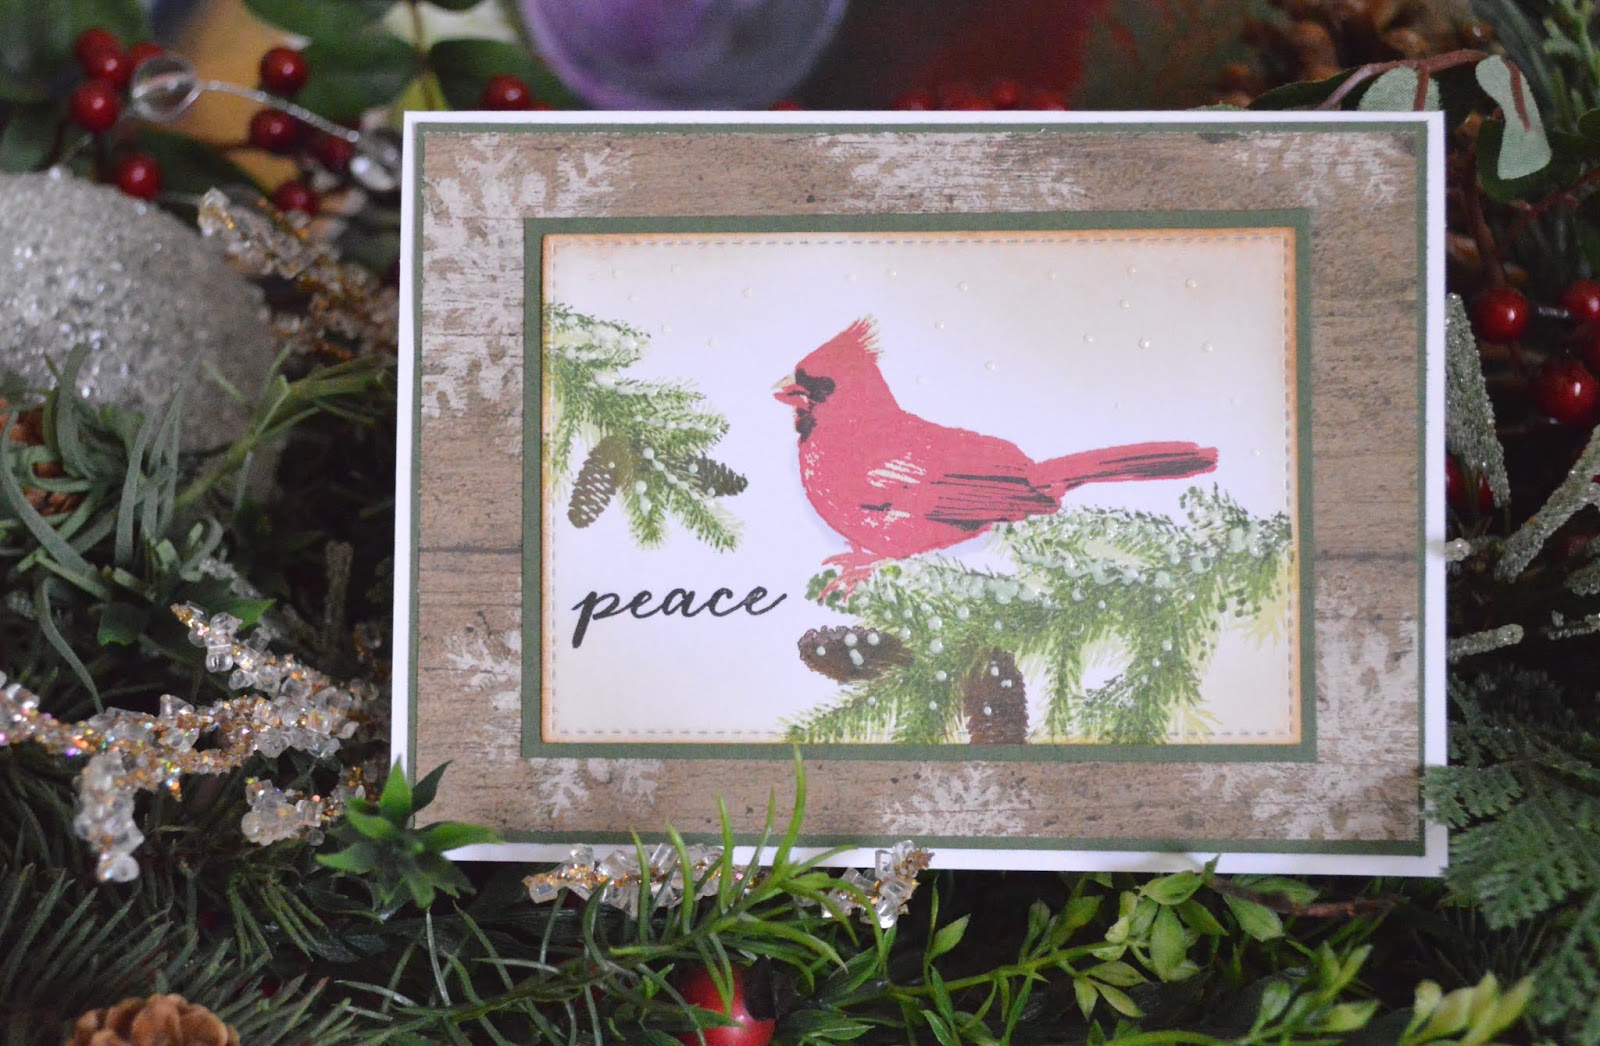
Kitchen Sink Stamps -Winter Cardinals


Welcome back everyone! I have been taking a bit of a break for a few reasons, but slowly moving back into work mode.

Today, I am going to feature a great company out of California, called Kitchen Sink Stamps.  I came to know of them this past summer while attending a stamping convention, called Junkie 
Fest, which was hosted by the Stamp Junkies, an amazing online Facebook group. Kitchen Sink Stamps has hundreds of designs and specialize in multi step clear stamps, where the images look very real. If you haven't checked them out....get on it!

Anyways, I have created several of these cardinal cards to use as Thank You notes that I am sending out this week. I had surgery one week before Christmas, and many, many people did wonderful and kind things to help my family and I out this last while, and I certainly wanted to create cards to share my gratitude. 

I kept all the cards similar as I wanted to get about 25 done in a short time while I was able to sit up (on bed rest...flat) and created them over 3 times in just over an hour. So not bad!

I started with an A2 white card base, then matted with olive green cardstock and a wood grain, snowflake patterned paper, all from Recollections. Then using Neenah white cardstock, I cut a bunch of mats at 4" x 2 3/4" and matted them again on the green. 

Image from Kitchen Sink Stamp

Then it was time to load my MISTI and get stamping! I started with the branches. I stamped the first layer using Versafine 'New Sprout', second layer is 'Olympia Green', followed by 'Vintage Sepia' for the pine cone layer.


For the cardinal, I used Rangers 'Antique Linen' first, followed by Lawn Fawn 'Lobster', then Hero Arts 'Red Midtone'. Last layer for the beak and a touch of detail is Versafine 'black onyx'

The cards received  different sentiments on the outside, yet all read Thank you on the inside. 
This "Peace" stamp shown here, is by Hero Arts.

After the cardinal was done, I added a very slight shadow under his belly with a C3 Copic marker. 

For just a bit more depth and keeping it easy, I went around the edges with a foam piece and a bit more antique linen ink. 

Finishing touch was the random snow using Nuvo drops in 'white'

I hope you enjoyed today's quick card and please do head over to Maria's wonderful company Kitchen Sink Stamps. She has great designs, and a sale on many sets right now!


Remember...be creative, think of others and kindness always matters.


 Kim

(please note, this is an affiliated post)


Monday, 5 November 2018

Snowman Friends


Hi there,

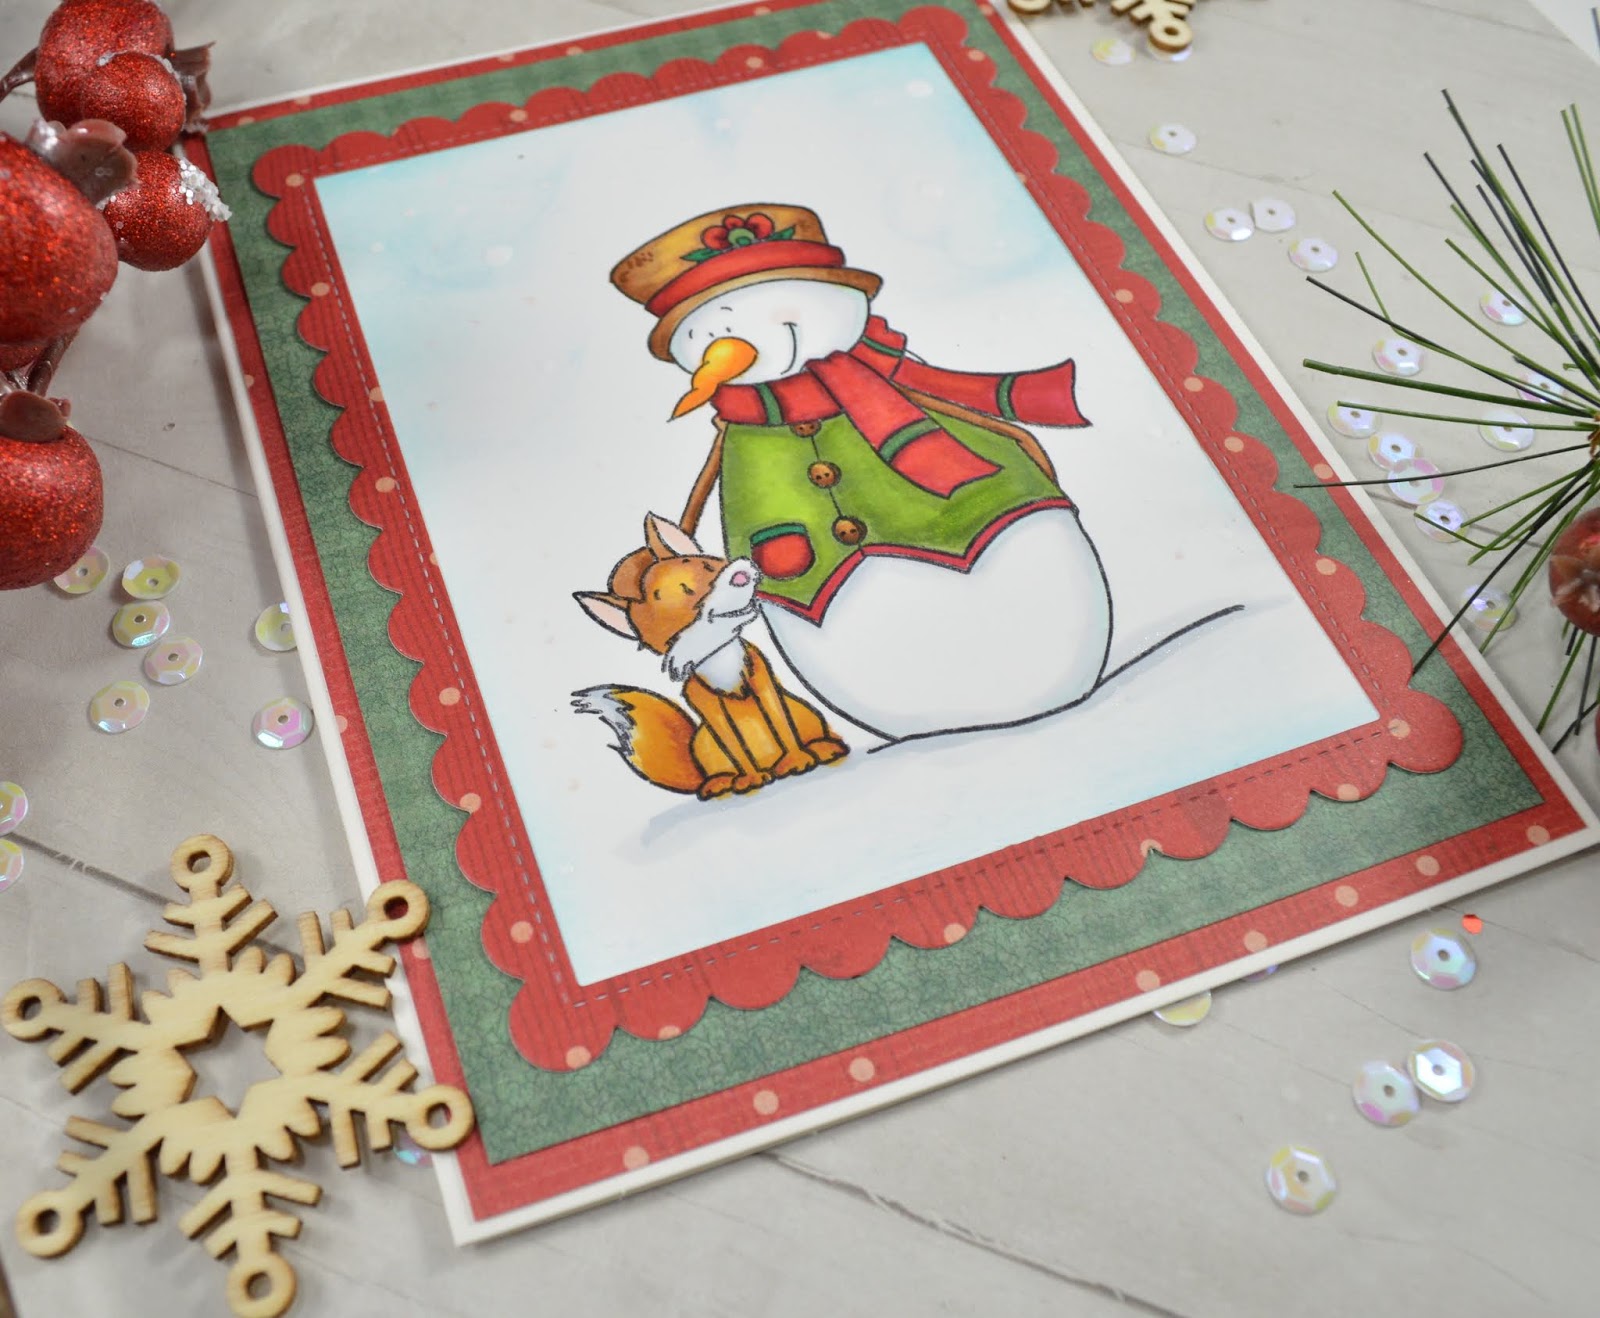
Hoping on here to share this adorable set I recently purchased "Super Cool Pals" from Kraftin' Kimmie Stamps. I am just in love with these two little friends!

I started off by stamping in Memento black ink, onto Neenah Solar White cardstock. I kept the colouring simple, and used a handful of Copics and worked with traditional Christmas colours.


Once the image was coloured, I simply added a bit of colour to the sky with tumbled glass Distress Inks, and added a touch of white paint splatter to give a snowy finish.


Simple mat of red and green, and done like dinner!

I absolutely love this set, and can't wait to make several more cards using it. Jump on over to this great Canadian owned business and stock up on some new stamps! www.kraftinkimmiestamps.com


Remember...be creative, think of others and kindness always matters.

 Kim


Wednesday, 17 October 2018

Christmas Reindeer with Mama Elephant


Hello everyone,

I am deep into Christmas creating over here, so I thought I would pop by and share a few cards and tags I made today using the super cute Mama Elephant set that is filled with playful reindeers. The set was released awhile ago, however, I just picked up the stamp and die combo recently, when I saw it on sale.

I started off by stamping a full sheet of Neenah solar white cardstock with the images, using Gina K Designs Amalgam ink, and went to town colouring them with my copics. All the reindeers are coloured similar with E31 and E33, and the hoofs and antlers were E37. The grey is W1. I kept them all fairly simple, with not a ton of shading,as I was trying to get 30 images coloured in one take while the baby was napping.


As for the paper, I used only scraps I had on hand. I have been working hard at using bit and pieces up and not cutting into a new sheet right now. Later in the season, that will come, but for now, there are so many scraps, there is no need


I also made 12 Tags. Once again, scrap bits for these cuties. I sell tons and tons of tags at my Christmas shows, and I know these guys will be some of the first to go this year. Or I may just keep them for myself!!


In total, I made 20 cards and 12 tags so far with this set, and I am sure a few more will follow.


I know many crafters are starting their Christmas creations already, so keep going and those that are procrastinating, like I usually do, get on it!  Hopefully you see something that sparks you, and inspires you.

Remember...be creative, think of others and kindness always matters.

 Kim


Saturday, 1 September 2018

Penguin Christmas Cards using Wild Rose Studio


I know, it is only the summer, but I am deep into planning and prepping for the Christmas season already. I have even started to create a few cards and tags, so I thought I would share!  Craft show season comes up quick, and these things always get away from me, so better to be extremely early, than not at all!

For these two cards, I worked with Wild Rose Studio Stamps. I have several different stamps from them, and boy, are they cute! This little guy and the owl set, are some of my most beloved stamps.


I have had this penguin stamp for a few years, and he has been used plenty of times, but I pulled him out anyways past all the new stamps I have, and started colouring.  He is so darn cute, I couldn't pass him up on the shelf!

To start off, I got out my Gina K. Designs Artist Choice 110lbs cardstock, and black Amalgam Ink.  As I was not sure if the penguins would be copic coloured or pencil coloured, this awesome ink by Gina K Designs allows me to use any colour medium, once I decide.   I went ahead and stamped a couple dozen, that way they are ready to go for a quick project another time. I decided to use my Copic markers for them.    


Penguin C1, C3, C5, C7 
Feet Y13, Y35, Y38, YR04
Present  BG10, B02, 
Ribbon Y11, E31, E33, R37
Scarf  YR000, R11, R83


Penguin C1, C3, C5, C7 
Feet Y13, Y35, Y38, YR04
Present YG03,YG63, G94
Ribbon Y11, E31, E33, R37
Scarf  R22, r24, R29, R35


Once these cuties were coloured, I set off on a hunt in my scrap pile for papers that would match. I have such a leftover stash of bits and pieces on my work space right now, I knew it would not be a problem to find matching papers, even if they weren't Christmas patterns per se. I cut the frame using a Lawn Fawn - Stitched Scalloped Die - from Bazzill paper, as well as the the red sentiment from Bazzill. The background  papers are from some very old Poppystamps leftovers, and the red denim is from Recollections...........not bad for a scrap pile offering!


Once the cards found matching papers to hang out with, it was just time to assemble and embellish. For that, I stamped the Merry Christmas sentiment with a Stampabilities stamp using Versafine ink, added sequins with Simon Says Stamp - Assorted Moonshine, and last, but not least, I dug out the bells, twine and wood snow flake from my stash. Of course, Stickles for a touch of glitter on their hats.


The Red and Green card front is popped up on two pieces of craft foam, just to give it a little dimension and to not make the card front bumpy on top of the wrapped twine. 


While I was colouring these guys last week, I put a fun poll on my Instagram account @thecreativecard, asking which colour combo folks liked better. For several days, the pink/teal combo won, but as of today, the red/green has won by a landslide! Sorry pink/teal!


Anyways, hope everyone is enjoying the end of summer and the routine that the fall season often brings. I know in our house, we are looking forward to the schedule of school and work. 

Remember...be creative, think of others and kindness always matters.

 Kim


Wednesday, 4 October 2017

Perfect Poinsettia


Yes, it may only be the beginning of October according to the calendar, however, Christmas is well under way on the crafting calendar!  Us makers, are always working well ahead. From this point on, my house has glitter trails everywhere as I am always working away on something to get ready for the Christmas craft show season.

I don't plan on buying too many new stamps/dies this year, as I did purchase many new ones last year, and never really got to use them all, so I will be selective this year. But, hey, it is early and I could be eating my words after seeing all the new stuff that will be released shortly by the companies!  One new one I have already picked up is from Gina K Designs, and it is called Perfect Poinsettia. It is a layering stamp and I just love it! I found it very easy to line up and get great results quickly. I have not played too much with different colour combinations yet, but I will as I create more and more Christmas cards. I know most people think of poinsettias as red flowers, but they do grow them in white and pink as well. When I was florist, pinks were always my favourite. I loved to see a mass of the pink flowers accented with gold decor, it was just so classy I thought.


Using my MISTI, I started off stamping using Gina K Design white pigment ink onto Gina K Design layering white paper. I used pigment ink first, as I find I can get a different look, when using dye inks as the layering colours on top. It also keeps the colours much brighter, once they all dry. Once I stamped the white layer, I give the same stamp a quick wipe to get the pigment off, then ink it up the 'Innocent Pink'. This is where the fun happens as you can see the dye ink sitting atop the pigment because it can't soak in right away, so it creates a bit of a beading or mottled look.


I continued to stamp out the next three layers, lining up the center each time. I found this set very easy for aligning the layers. I focused on one cut out area each time and was just fine for placement. You can see in the picture which little notch I used!


The outline layer was done in 'Kraft', the next layer was 'Dusty Rose' and the final detail layer was 'Red Velvet'.  Leaves were done in Dandelion, Jelly Bean Green and Grass Green.


After all the stamping was done, I fussy cut out the leaves and two flowers as I wanted layers and depth for the card front.

To create the card, I embossed the green layer of paper with a swiss dot pattern and then started adhering all the pieces. A quick sentiment and some enamel dots and card was complete!

I look forward to making many more cards with this set and seeing all the possibilities it has. For now, I hope this one has inspired you to start creating some Christmas cards or maybe complete some you already have underway. Remember to check out Gina K Designs for this set and other new ones that will be released shortly.


(This is not a product affiliated post.....I just share what I buy and love)


Remember...be creative, think of others and kindness always matters.

 Kim